

The Salesforce Pre-Send Checklist: 7 Things to Verify Before Your Next Email Campaign
14 Jul 2026
Table of Contents

Nobody plans a failed campaign. Nobody sits down and decides “let’s tank our sender reputation this quarter.” And yet it happens, over and over, for reasons that have almost nothing to do with the subject line or the offer. It happens before send. In the list.
I’ve watched marketing ops teams spend three weeks on segmentation and personalization, then lose half their deliverability gains because nobody checked whether the list had been touched since the last data import. That’s the hidden cost of skipping Salesforce email verification: it’s invisible until the bounce report shows up, and by then the damage to your sender reputation is already logged.
Wondering why some campaigns bounce more than others?

Table of Contents
Why Salesforce Campaign Teams Need a Pre-Send Checklist
Here’s the blunt version: most Salesforce marketing teams don’t have a formal pre-send process. They have habits. Someone eyeballs the list, checks for obvious duplicates, and hits activate.
That approach worked when lists were small and campaigns were occasional. It doesn’t work now.
A real pre-send checklist does five things well. It reduces hard bounces before they happen. It protects the sending domain’s reputation with mailbox providers. It improves open and click metrics because the list actually reaches inboxes. It cuts wasted spend on contacts who were never going to engage. And — this one gets ignored constantly — it makes your reporting accurate, because a campaign report built on a dirty list is lying to you about performance.
Salesforce marketing data quality isn’t a back-office concern. It’s the foundation everything else sits on.
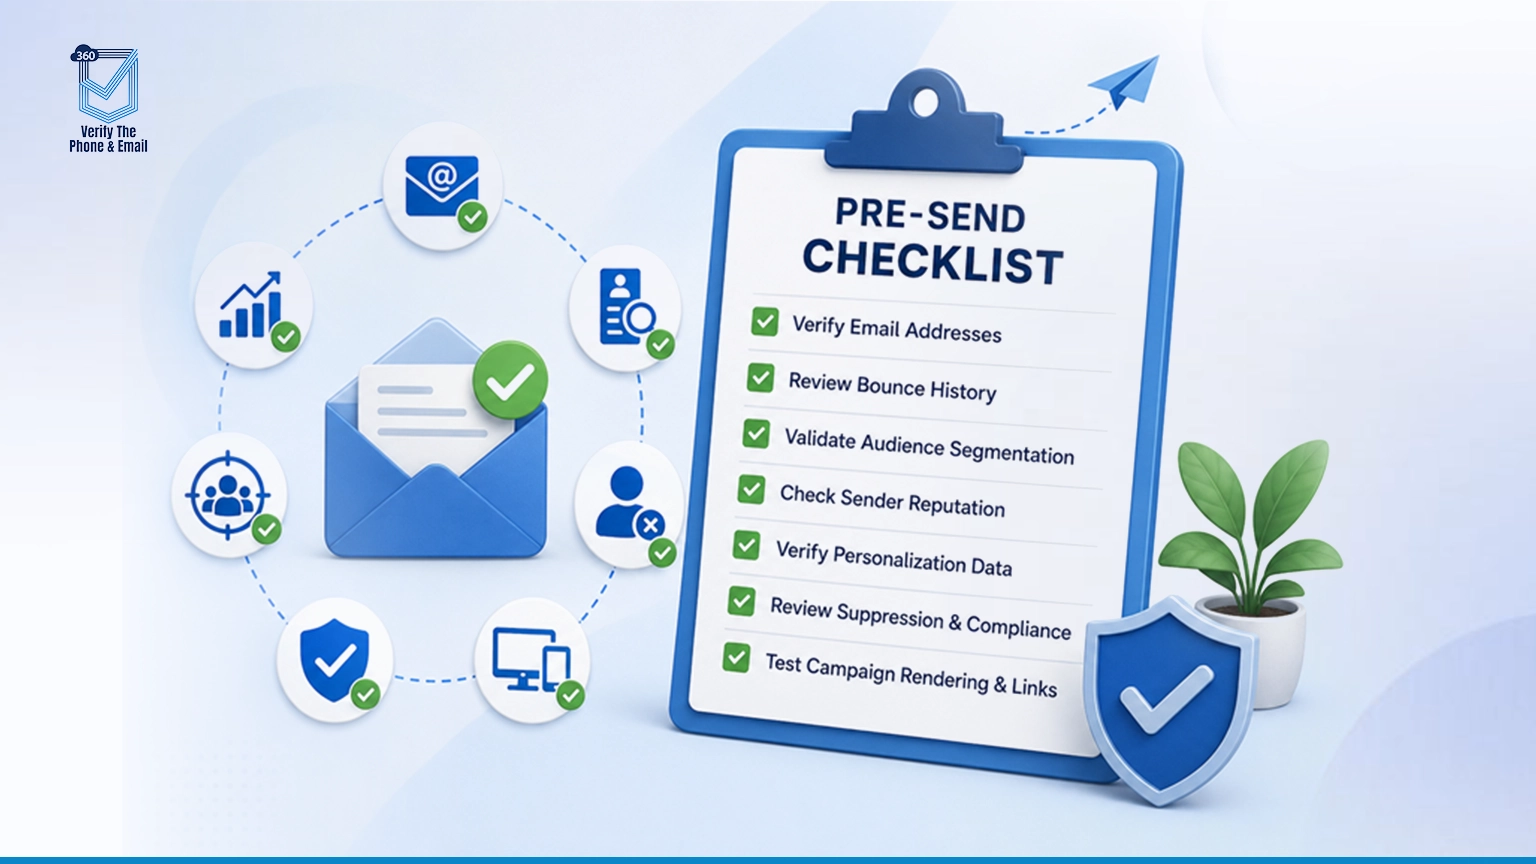
Checklist Item 1: Verify Email Addresses
Start here. Not with segmentation, not with subject line testing. Address validation.
Salesforce email validation at the record level catches four categories of risk: invalid syntax, disposable domains, catch-all addresses that accept everything and deliver nothing, and mailboxes that simply don’t exist anymore. Run this before every send, not just at list import — contacts decay fast, and a list that was clean in January can carry real risk by June.
Real-time verification during form capture stops bad data at the door. Bulk verification cleans what’s already sitting in your org. You need both. A tool that only does one leaves the other half of the problem untouched, and that half is usually bigger than people expect.
Checklist Item 2: Review Bounce History
Bounce history is the closest thing Salesforce gives you to a paper trail. Use it.
Hard bounces mean the address is dead — permanently suppress those contacts, no exceptions, no “let’s try again next quarter.” Soft bounces are murkier. A full inbox or a temporary server issue isn’t the same as a mailbox that no longer exists, so trend the soft bounce pattern across a few sends before deciding whether to suppress.
List health monitoring should run continuously, not as a one-time cleanup project. Set it, watch it, adjust it.
Checklist Item 3: Validate Audience Segmentation
A verified list sent to the wrong segment is still a failed campaign. Different problem, same outcome.
Before you activate, confirm the campaign’s inclusion criteria actually match the contacts pulled into it. Check for duplicate records across your Salesforce org — a contact who exists twice under slightly different email formats will throw off both deliverability and reporting. Look for audience overlap between simultaneous campaigns; nobody wants three emails landing in the same inbox on the same Tuesday. And validate lifecycle stage. A prospect nurture sequence going to closed customers isn’t just wasteful. It’s the kind of thing that makes people unsubscribe out of irritation.
Checklist Item 4: Check Sender Reputation
Your domain has a reputation whether you’re tracking it or not. The only question is whether you know what it says.
Domain health, complaint rates, spam signals, and authentication records (SPF, DKIM, DMARC) all feed into how mailbox providers treat your next send. A sharp rise in spam complaints after a campaign is a signal worth chasing down immediately — waiting until the next quarterly review means you’ve already sent two or three more campaigns into a degrading reputation.
Checklist Item 5: Verify Personalization Data
Merge fields are where good campaigns go to die quietly.
A missing first name field turns “Hi {{FirstName}}” into “Hi ,” and that typo-looking gap tells the recipient exactly how automated your process is. Test fallback logic before send — every merge field needs a sensible default, not a blank space. Missing values should get caught in QA, not discovered by an annoyed customer replying “who is this.”
Checklist Item 6: Review Suppression and Compliance Rules
This section matters more than almost anything else on this list, and it’s the one people rush through.
Unsubscribe suppression has to be airtight — sending to someone who opted out isn’t just bad practice, in many jurisdictions it’s a compliance violation with real penalties attached. Regional rules differ: GDPR requirements in the EU aren’t the same as CAN-SPAM in the US, and if your org serves multiple regions, your suppression logic needs to reflect that. Internal suppression lists (competitors, press, do-not-contact flags from sales) need to sync automatically, not depend on someone remembering to check a spreadsheet. And duplicate campaign prevention stops the same contact getting hit twice through two different campaign paths that were never meant to overlap.
Checklist Item 7: Test Campaign Rendering and Links
Last step. Also the one that gets skipped when a launch is running behind schedule — which is exactly when it matters most.
Send a test to yourself. Check every link. Check how it renders on mobile, because a majority of B2B recipients now open first on a phone, and a broken mobile layout kills your click-through before anyone reads a word. Confirm your CTAs are visible without scrolling through three screens of preheader text. Confirm tracking is actually turned on — nothing worse than running a flawless campaign and having zero click data to show for it.
Building a Salesforce Pre-Send Workflow
Checklists in someone’s head don’t scale. Checklists in a shared doc get skipped under deadline pressure. What holds up is a workflow built into Salesforce itself.
That means Flow-based automated checks, a campaign approval process that requires sign-off before activation, suppression logic that runs without manual triggering, and a readiness score that tells the team — plainly — whether a list is fit to send. None of this needs to be complicated. It needs to be automatic enough that skipping it takes more effort than following it.
How to Automate Pre-Send Checks Using Salesforce Flow
This is where 360 VTM/VTP earns its place in the stack.
VTM/VTP plugs into Salesforce natively, which means verification doesn’t happen in a separate tool that syncs data back on a delay. It happens where your contacts already live — inside the CRM record itself.
How it works in practice: VTM/VTP checks email addresses and phone numbers against live validation logic, flags invalid or risky records with a verification status field, and lets you build Flow rules that block unverified contacts from entering a campaign in the first place. Set up a campaign readiness rule once, and every future send inherits the same protection automatically.
Verification types covered:
- Email verification — syntax, deliverability, disposable and catch-all domain detection
- Phone verification — mobile, landline, and VoIP number classification
- Bulk verification — clean an entire list of 50,000 contacts in one pass instead of record by record
- Real-time verification — validate at the point of capture, before a bad address ever gets into your org
A real scenario: a RevOps team running a quarterly nurture campaign to 40,000 contacts sets a Flow trigger that runs VTM/VTP verification the moment a campaign member is added. Invalid and high-risk addresses get auto-suppressed before the send list is even finalized. No manual export to a third-party validator, no CSV round-trip, no delay waiting on an outside vendor’s turnaround time.
Automation and re-verification: contact data decays — people change jobs, carriers reassign numbers, domains go dead. VTM/VTP supports scheduled re-verification so a list that was clean six months ago gets checked again automatically, not just at the moment of import. You can schedule this monthly, quarterly, or tied to specific campaign cadences, whatever matches how your org actually operates.
Reporting: verification status, bounce risk scoring, and engagement tracking roll up into Salesforce reports and dashboards you already use, so campaign readiness becomes a number your team can check before every launch — not a guess.
Not sure if your contact data is actually campaign-ready?

Common Campaign Launch Mistakes
A few patterns show up again and again, across industries, across list sizes:
Sending to a list that hasn’t been touched since the last import. Ignoring bounce history because “it’s probably fine.” Skipping personalization QA because the deadline is tight. Missing deliverability checks entirely because nobody owns that step. And testing the campaign in a rush, five minutes before the send button, when a broken link has already gone unnoticed for the whole build.
Every one of these is preventable. None of them are rare.
Business Benefits of a Pre-Send Checklist
The upside compounds. Higher deliverability means more of your list actually sees the email. Lower bounce rates protect the sender reputation that every future campaign depends on. Engagement improves because the people receiving your emails are the people who can actually open them. Campaign ROI goes up — not because you’re sending more, but because you’re wasting less on addresses that were dead weight from the start.
Final Thoughts
Successful campaigns don’t start at send. They start days earlier, in the unglamorous work of checking a list nobody wants to check.
Deliverability is a preparation problem before it’s ever a content problem. Salesforce email verification, automated through Flow and tools like VTM/VTP, turns that preparation from a manual chore into something your CRM handles on its own. Quality beats volume, every time — a smaller, verified list will consistently outperform a larger, unchecked one.
If your team is still validating lists manually before every send, that’s worth fixing before your next campaign, not after the bounce report comes back.


Solve It with Salesforce. We’ll Show You How.
AI. Apps. Experts. Everything you need to win with Salesforce under one roof.Frequently Asked Questions
What should be checked before sending a Salesforce email campaign?
Address validity, bounce history, segmentation accuracy, sender reputation, personalization data, suppression compliance, and rendering. Seven checks, roughly in that order.
How can Salesforce teams reduce bounce rates?
Verify addresses before every send, not just at list import. Suppress hard bounces permanently and monitor soft bounce trends before deciding whether to suppress those too.
Why is email verification important before campaigns?
Because a single bad send can damage sender reputation for weeks. One dirty list, sent once, can undo months of deliverability work — that's the honest answer.
How does sender reputation affect deliverability?
Mailbox providers use it to decide whether your emails land in the inbox or the spam folder. Poor reputation gets your legitimate emails filtered along with the bad ones.
What is a healthy email bounce rate?
Generally under 2%. Anything consistently above that is worth investigating — it's usually a data hygiene issue, not a content issue.
Can Salesforce automate pre-send checks?
Yes, through Flow-based automation paired with a verification tool like VTM/VTP. Manual checklists work until they don't; automation is what actually scales.
Should hard-bounced contacts be suppressed permanently?
Yes. A hard bounce means the address doesn't exist. Sending it again won't change that, and it will keep hurting your reputation every time you try.
How often should Salesforce email lists be verified?
At minimum, quarterly. High-volume or high-decay lists (real estate, recruiting, events) may need monthly re-verification. It depends on how fast your data actually decays.
Can Salesforce Flow automate email verification?
Yes — Flow can trigger verification the moment a contact is added to a campaign and block unverified records from being included until they pass.
How do pre-send checks improve campaign ROI?
By cutting waste. You stop paying to send, track, and follow up on contacts who were never reachable in the first place, which means every dollar spent goes toward contacts who can actually convert.

About the author
Editorial TeamThe Editorial Team at 360 Degree Cloud brings together seasoned marketers, Salesforce specialists, and technology writers who are passionate about simplifying complex ideas into meaningful insights. With deep expertise in Salesforce solutions, B2B SaaS, and digital transformation, the team curates thought leadership content, industry trends, and practical guides that help businesses navigate growth with clarity and confidence. Every piece we publish reflects our commitment to delivering value, fostering innovation, and connecting readers with the evolving Salesforce ecosystem.
Recent Blogs
 360 Verify The Phone
7 Phone Validation Tools That Integrate With Salesforce Workflows
Summary Most phone validators don’t actually integrate with Salesforce workflows. They bolt on. This guide compares 7 tools on the criteria Salesforce admins and ops…
Read More 360 Verify The Mail
Plauti Verify vs 360 Verify the Email: Which Fits Your Salesforce Team?
Summary Plauti Verify offers broader Salesforce data quality capabilities, including assisted data entry and record-level validation. 360 Verify the Email focuses on real-time email and…
Read More 360 Verify The Mail
Salesforce Data Validation Rules vs Automated Data Validation Tools: What’s the Difference?
Here’s an uncomfortable truth most Salesforce teams don’t want to sit with: your CRM can be technically clean and practically useless at the same time. …
Read MoreReady to Make the Most Out of Your Salesforce Instance?
Our Salesforce aces would be happy to help you. Just drop us a line at contact@360degreecloud.com, and we’ll take it from there!
Subscribe to our newsletter
Stay ahead with expert insights, industry trends, and exclusive resources—delivered straight to your inbox.