360 degree cloud technologies pvt. ltd.
Flag_of_the_United_States

US

  • Flag_of_the_United_States

    US

    +1 309 316 7929
  • Flag_of_the_United_Kingdom

    UK

    +44 789 703 1106
  • Flag_of_Australia_converted

    AU

    +61 4800 94870
360 degree cloud technologies pvt. ltd.

Let's automatically route leads and Customer tickets to your teams with Omnichannel

Suppose you’ve worked in the Salesforce ecosystem for a long time, whether as a developer, admin, or user; it’s likely that you’ve heard of Salesforce Omni-Channel. But do you know what it is and how to set it up?
Salesforce Omni-Channel is a popular feature of Service Cloud and is highly used. As the name implies, Omni-Channel simply means “all channels,” allowing customer service agents to handle customer queries via all channels so they can deliver a consistent experience. Let’s unpack more about omnichannel.

What is Omni-Channel?

Customers always expect flexibility when they look for support from a company. Some customers prefer email, while some work with service portals, some with web chat or SMS, and others still go with the convenience of a phone call.

The support team must be able to connect with customers, but how are they supposed to juggle customer concerns coming in from all different directions? Enter Omni-Channel to the rescue, and we as a Salesforce consulting firm would help you get the best out of it.

According to Salesforce, Omni-Channel forms The Three Cs — Complete, Consistent, and Connected. Omni-Channel helps you provide a comprehensive and complete customer experience regardless of the channel. It ensures a consistent experience while making it easier for agents to manage the work.

Salesforce Omni-Channel Routing to Automate Your Case Assignments

Getting the proper support request to the right agent can be challenging if you’re running customer support. Support centers receive numerous customer requests from various sources, with varying customer needs.
Traditionally, Case Assignment Rules are used for case assignments in Salesforce. These simple automation rules help send cases to individual users based on case criteria or a holding queue. Agents must manually review queues and pull work items out. Thankfully, there’s a better solution now to simplify the work.
Salesforce Omni-Channel Routing supercharges this traditional queue assignment process with automated assignments from queues directly to the suitable agents.
It enables an agent to log into the routing system and receive cases automatically from the assigned queues without needing any assignment. The feature is smart enough to consider the agent’s capacity, age, and priority of the work item while assigning any query.

Ways Salesforce Omni-Channel Can Help You

Different ways Salesforce Omni-Channel can help you are mentioned below:
It helps you route Incoming work to queues based on the case type and details.
Supervisors can manage queue assignments by easily assigning agents only to queues they are trained on. It ensures that the right agent with the needed skill set gets the case.
Supervisors can also manage the number of cases an agent can handle simultaneously. Cases get automatically routed when they come into agents with the availability and capacity to handle the case. If no agents are available, the cases wait in the queue and go to the next available agent.
Agents only get work when they log in. This ensures they don’t get work when they’re out of the office or on break.
You can also access the Salesforce Omni-Channel Supervisor app so team leads and managers can see their agents with assigned workloads and the cases waiting to be assigned. All of it can be accessed in one view instead of navigating multiple dashboards and reports.

How to Enable Omni-Channel in Salesforce?

The feature of Omni-Channel sounds pretty awesome, doesn’t it? But how do you set it up in Service Cloud? Let’s walk through the steps involved in the basic Omni-Channel setup.

1. Enable Omni-Channel

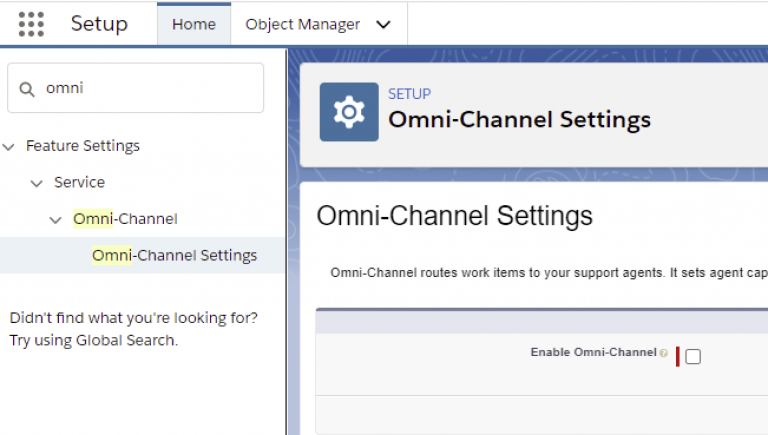
To turn on the feature, go to Setup > Feature Settings > Service > Omni-Channel > Omni-Channel Settings.
You can also do so by going to Service Setup > Administration > Omni-Channel > Omni-Channel Settings. You can also simply type “Omni-Channel” in Setup Quick Search.
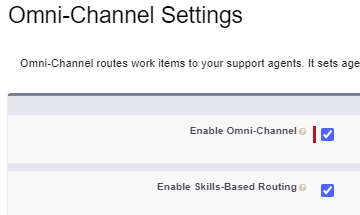
You’ll see the box Enable Omni-Channel. Check it and click Save.

2. Omni-Channel Routing

The most important thing for which Omni-Channel is used is routing. With Omni-Channel, there are three routing options — Queue Based, Skill Based, and External.
We’ve provided here a quick setup guide for Queue-Based and Skill-Based Routing. External Routing setup can go slightly differently depending on your third-party app.
Queue-Based Routing
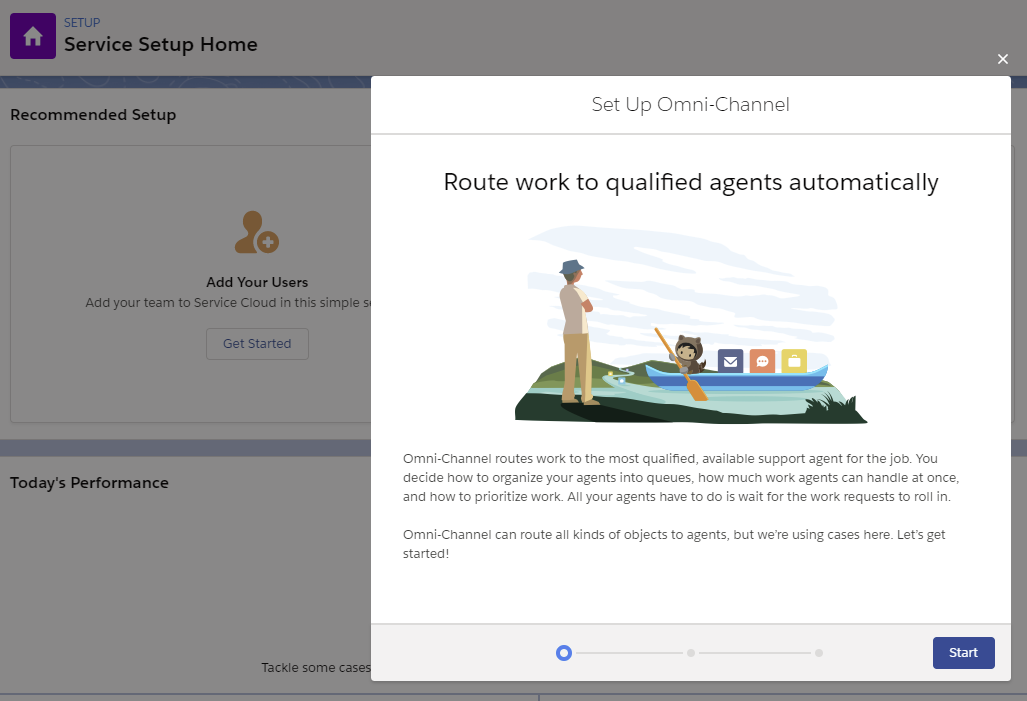
Queue-based routing is pretty straightforward, and Salesforce even has a simple setup flow to start the process. Go to the Omni-Channel Setup Flow in Service Setup.
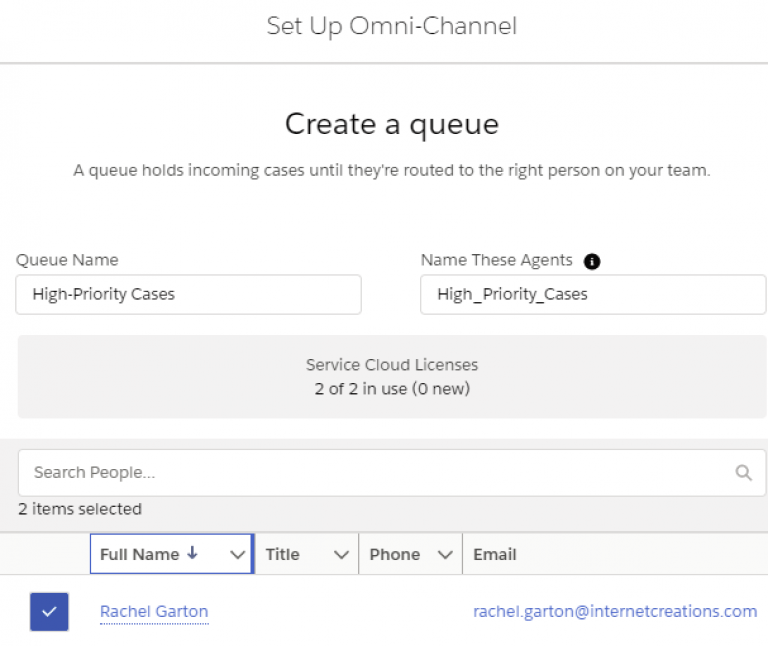
In the setup flow, create a queue and assign specific agents to that queue. You can leave the Agent Workload settings as the default.
Skill-Based Routing
Skill-based routing is capable of handling more complex customer service needs. But it is also more complicated to configure.
Step 1
Check the box to Enable Skill-Based Routing in Omni-Channel Settings.
Step 2
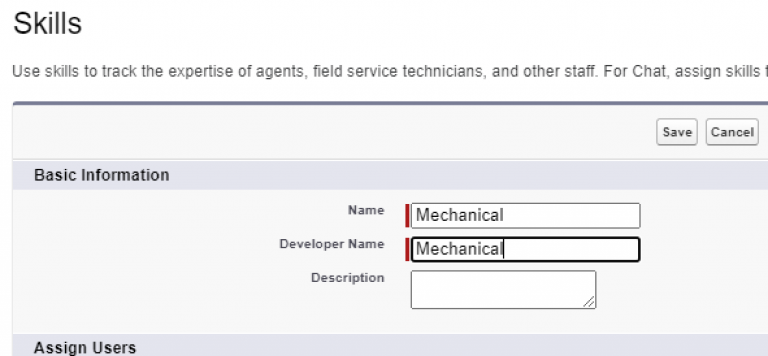
Then you have to configure skills for your agents. For example, let’s use “Programming” and “Mechanical” skills for a random gadget company.
Go to Omni-Channel > Skills in setup. Then click New and create basic skills. You don’t have to worry about assigning users yet.company.
Step 3
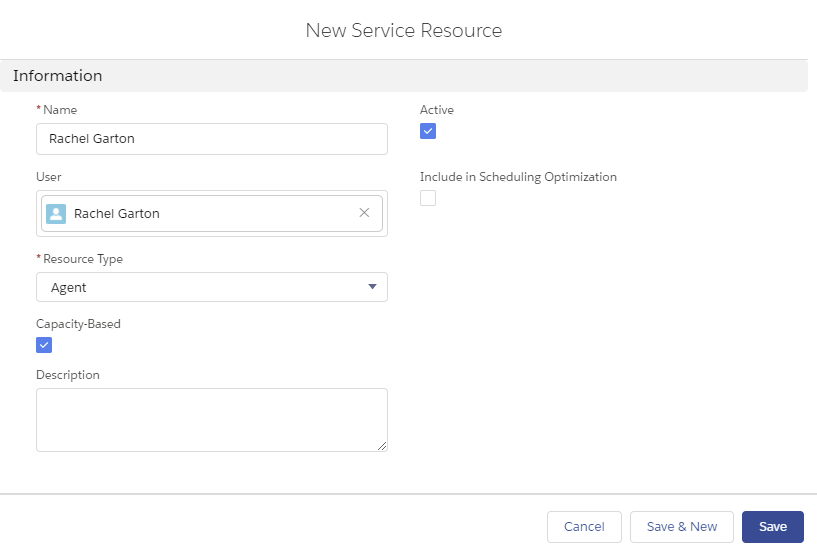
Next, you’ll create Service Resources to link agents (users) to skills.
You must find the Service Resources object in the App Launcher and create New. Then Active service resources for your agents.
Now add the skills to the resources in the Skills-related list.
Step 4
Now you have to tell Omni-Channel how to use the skills for routing the work.
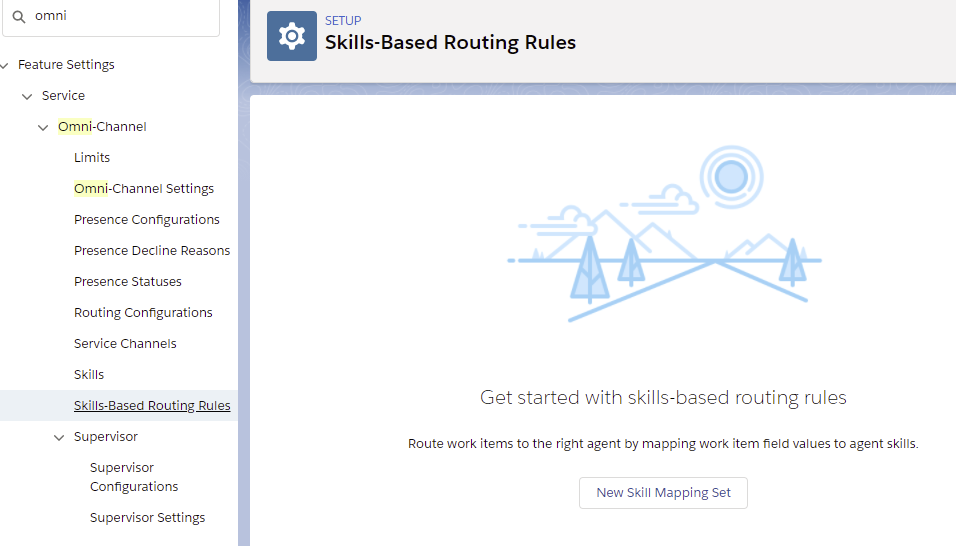
Go to Skills-Based Routing Rules in Setup and select the New Skill Mapping Set button.
Create the skill mappings for defining field values to align with specific field requirements.
For example, cases with a Case Type of ‘Mechanical’ will be aligned with the Mechanical Skill.
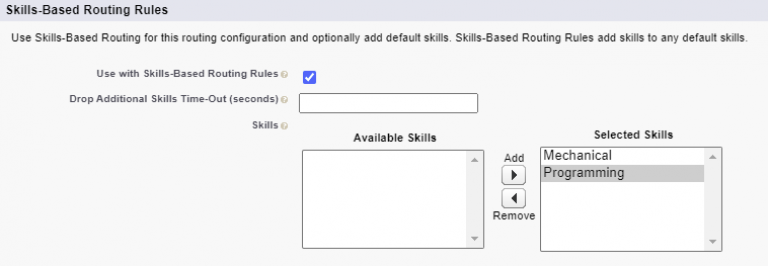
Lastly, you just have to ensure any existing Routing Configurations are enabled for using the necessary skills.
You can directly set up Omnichannel using the PDF on
Steps to set up Salesforce Omni-Channel. → 

Winding Up

Omni-channel is not just a good idea for a business but a necessity. Today’s customer expects a company to deliver a connected experience, and Salesforce omnichannel makes that possible. Agents can now easily handle multiple conversations simultaneously to achieve maximum productivity and customer satisfaction.

The attached PDF will guide you well when setting up Salesforce Omni-channel. But if you get stuck or need assistance, consider contacting our best Salesforce consultants for the best support.

Need help implementing this?

Leave your details here and consulting expert will get back to you and hold your hand through this


Loading......


Captacha

refresher