On a typical day, you’d surely be using a myriad of software, from email to other business applications that simplify your daily tasks. While it helps you with your work, remembering all of the usernames and passwords to these multiple accounts can be challenging.
Enable Single Sign-on systems (SSO) on your Salesforce can alleviate the stress and struggle of recalling a multitude of credentials for all your applications.
SSO helps businesses improve the user experience by simplifying the login process to apps. Whether you’re navigating through your business application or any other third-party apps, SSO streamlines the entire process, helping you access any of these applications easily.
What is Salesforce Single Sign On?
Salesforce Single Sign-on or Salesforce SSO allows all users to access all authorized network resources using a single username and password. This eliminates the need to remember and enter different usernames and passwords each time you try to log in to any resource in the network.
Consider a case, in an organization, there are multiple applications, systems, and resources to be accessed by every user. To access those resources, the user has to log in to that application using the authorized username and password. But if he needs to access more resources, it can be really difficult to remember passwords for each of those resources. SSO helps to eliminate this kind of issue.
There are numerous advantages that you can uncover with Salesforce SSO.
You have to spend less time managing and recalling passwords when logging in.
Not having to log in manually to Salesforce saves time for employees. All those seconds spent logging into multiple applications can really add up for employees.
SSO enables more people to use Salesforce. You can easily send out links to Salesforce reports and records, which recipients can open just with a single click.
Access to sensitive information can be managed just from one place.
How to Enable Salesforce Single Sign-On
Now let’s start with the steps to enable Single Sign-On for your Salesforce.
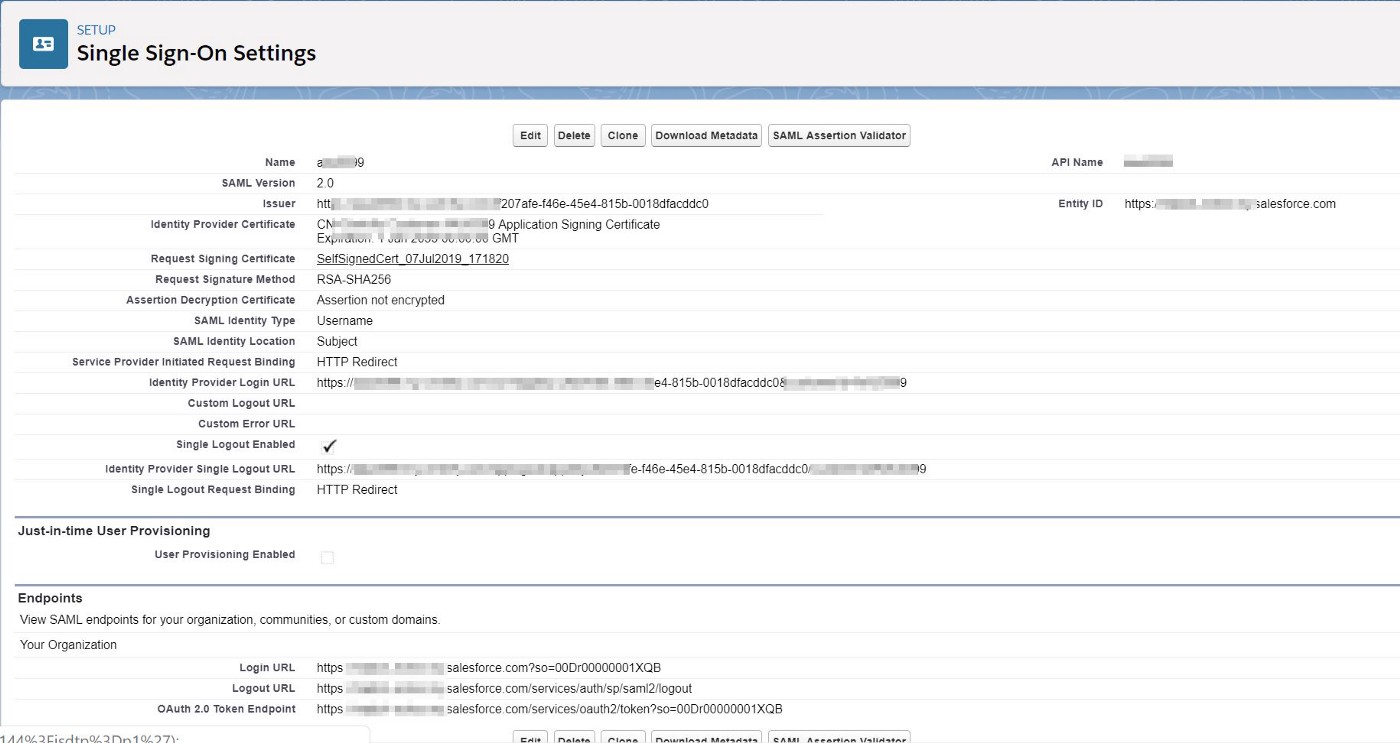
Step 1:Start with creating “New” in SAML Single Sign-On Settings.
Go to Setup and enter “Single Sign-on Settings” and click on the mentioned link.
You have to select one of the following options:
– New
– New from Metadata URL
– New from Metadata File
Step 2:After clicking on New, you have to fill in the required fields.
Step 3:Next, you have to enable SAML.
This is an important checkbox that you should not miss out on.
Without enabling SAML, you won’t be able to select SSO as an option for your users.
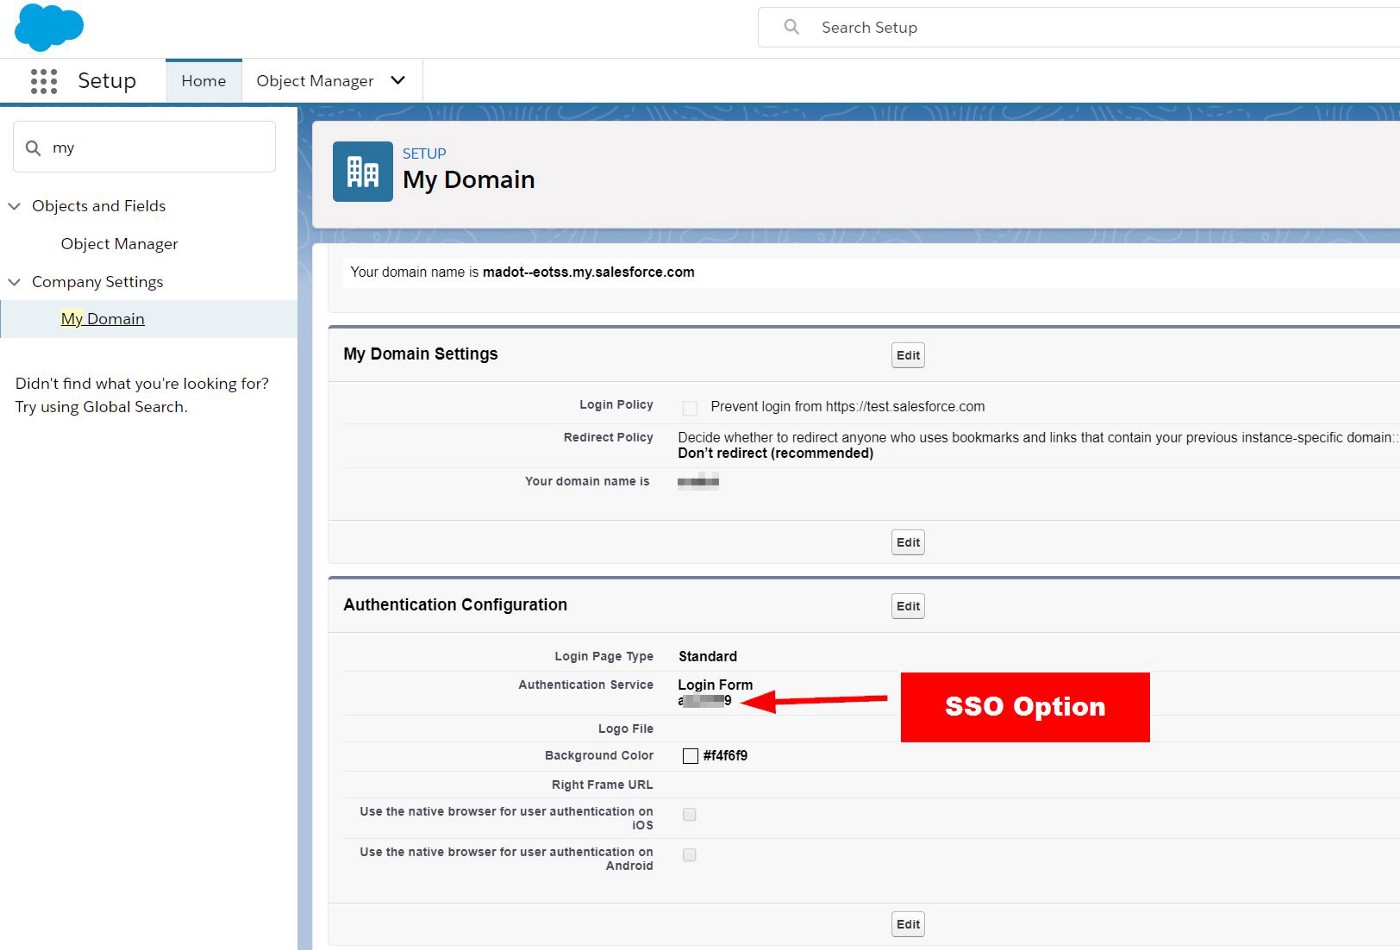
Step 4:Now, you’ll have to allow users to log in using SSO
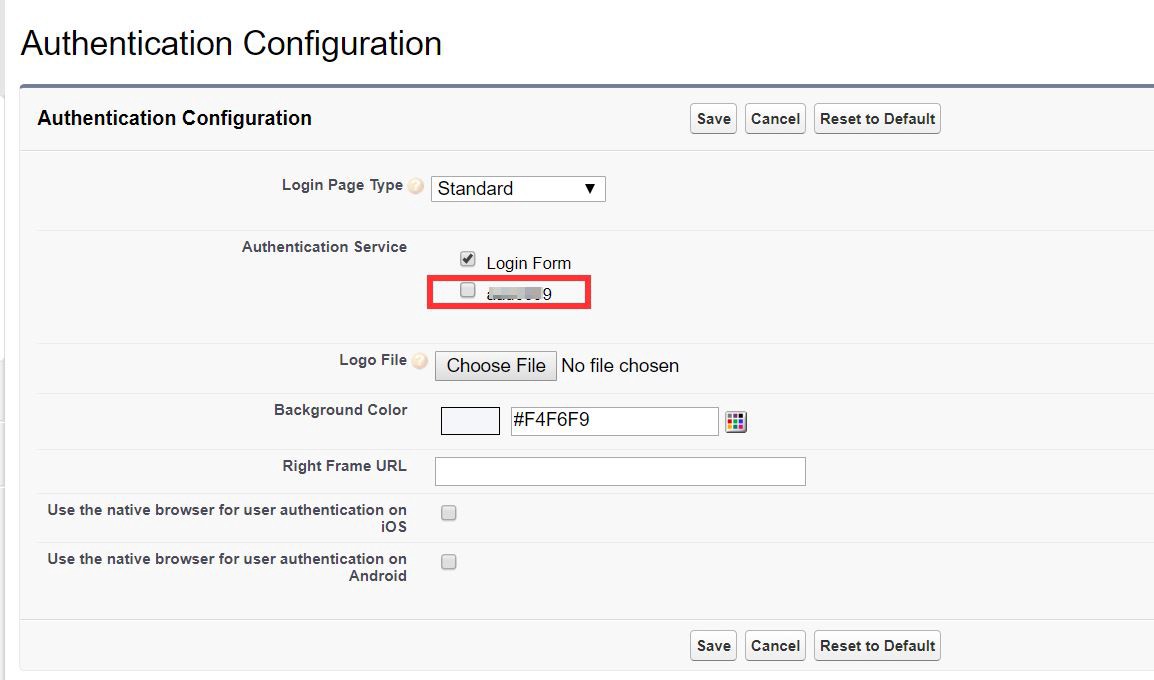
Select My Domain from Setup. Select Edit > Authentication Configuration.
After clicking Edit, select the newly created SSO option for users to login in.
Once you’re done with it and try to login into Salesforce, you’ll find an additional option to use the mentioned SSO to log in
Salesforce SSO helps to streamline the login process, so you don’t have to enter your credentials again after putting them in once. If you put together the amount of time spent re-entering complex passwords, this is a real time saver!
We’ve attached a downloadable PDF so you can enable SSO easily. But if you need any assistance or learn to know more, reach out to our certified Salesforce consultants.